Saturday, December 8, 2012

Guest Post: Ceviche, Tortilla Soup, Tacos & Mango Salsa

 Colin doesn't always cook. But when he does, he does it for REAL.

A few weeks ago he made me a wonderously large and mexican meal from scratch that was UNREAL. I mean vegan ceviche? Incredible.

I've been bugging him since to blog about it and he finally did :)

Here is his post + accompanying pictures:

The time had come for me to flex my culinary muscles.  Every so often it's time to take the driver's seat and make sh*t happen in the kitchen, and just when I had lulled Taylor into a state of complacency where on some level she had to be doubting my ability to muster so much as a can of chili to nourish myself - I took my opportunity to pounce.

Sometimes I just wake up and get an urge to do something creative.  That's why I'm in the field I am in and that's what keeps things exciting for me.  Sometimes I build, sometimes I come up with ideas, sometimes I draw, and sometimes I cook.  For me cooking is at its best when it is a creative challenge, and when it involves an element of design and presentation - that is when a truly satisfying meal results.

My idea for this challenge was a multi-course vegan meal highlighting a particular food culture.  I came up with three ideas - Asian, Latin, and Northern European.  Latin won out because I was excited to take a stab at a vegan version of one of my favorite dishes - ceviche.

Ceviche is one of those near deal-breaker foods for me.  Deal breaker in the sense that I love it so much it could almost be that insurmountable obstacle preventing me from being vegan.  Almost.  But my experience with Taylor, and the broader Portland food scene, is that if there is a food you love and it doesn't adhere to your dietary restrictions, you re-vision it in a way that does.  And that is why I spent the better part of my day, on this particular Thursday, driving all around town in search of vegan scallops.

Ceviche is a simple dish in theory, that is impressively complex in execution.  At its essence chopped fish pieces, "cooked" in the acidity of lime juice, it is a dish that is so rich with flavor that any number of things could make it go wrong, and the best ceviche is probably the product of generations of tweaking a recipe and passing it down.  Probably every town from Baja to Argentina has their own spin on ceviche and each will claim it's the best.  Here's my vegan ceviche:

VEGAN CEVICHE
Bag of vegan scallops, cubed
Juice of 6-8 fresh limes
Diced bunch of cilantro
1/2 large white or yellow onion, roughly diced
1-2 Heirloom tomatoes, diced
Drizzle of Olive Oil
Splash of fresh squeezed orange juice
Pinch of Salt and Cracked black pepper

After cubing the scallops (larger pieces are nice when working with real scallops, but vegan scallops are a little harder so I recommend smaller pieces than even the ones depicted below) layer the cut pieces in a shallow bowl or Pyrex dish.  Add diced onions and toss.  Cover the tossed mixture with the juice of the limes.  Save a little bit (1/4 cup) for later.  Ensuring that the mixture is almost fully covered by the lime juice, refrigerate it for 3-6 hours.  The 3 hour limit is considered the minimum time for the acid to "cook" raw fish, however in this case it is simply about imparting the lime flavor into the vegan scallops.  Because of the nature of the medium, I think more than 3 hours would be desirable - in my case it was just all I had.  So whip up the concoction in the morning, let it marinade all day at work, and finish the ceviche for dinner.

To finish the ceviche, take the "cooked" scallops out of the fridge, and drain the lime juice.  There is no nasty by product with vegan ceviche so you don't have to be pedantic about it, you just want to get rid of most of the juice so the end product isn't over the top limey.  Add diced tomatoes, diced cilantro, splash of orange juice, drizzle of olive oil, and a splash of fresh lime juice (that you saved) to the mixture.  The orange juice may be the trick here because it imparts the desired citrus element but the natural sweetness of it will help cut the sharpness of the lime.  Toss the mixture thoroughly and salt and pepper to taste.  The result should be light and fresh and crisp and should look like this (below).  Serve with round tortilla chips, or more traditionally, with flat baked tortilla rounds.


Now, when I go to a Mexican restaurant, ceviche is always going to be part of my lineup, but rarely will it be the sole dish.  I wanted ceviche to be the appetizer in this meal, and the real stars to follow.  Next, I'll introduce you to my fresh mango salsa, a necessary part of the dishes to come.

I learned this simple salsa recipe on a sailing trip and it stuck with me ever since.  The relative strength or weakness of the dish is in the ratio of its ingredients.  Too much bell peppers and you have a meek and mild dish.  Too much mango and you have a fruit salad.  Overcook it and the flavors are shot and the consistency sucks.  You get the point - so I'll say that this batch turned out particularly well but you have to fine tune this recipe to your own tastes.

COLIN'S MANGO SALSA
3 Heirloom tomatoes, diced
1 red bell pepper, seeded, diced
1 orange or yellow bell pepper, seeded, diced
3 jalapenos, seeded, minced
1 serrano, seeded, diced
1/2 onion, diced
1 large mango, diced
Bunch of Cilantro, diced
Juice of 3-4 limes
Pinch of Salt and Pepper

In a medium to large pot, combine the bell peppers, jalapenos, serranos, and onion.  Add 3/4 of the lime juice and heat over medium-low.  Heat until steam and sporadic bubbling occurs.  If you heat it too long the whole thing will get frothy, and then you know you're sunk.  So after 5-10 minutes of heating, remove it from heat.  Add the tomatoes, cilantro, and mango, and chill in the refrigerator for 1 hour (or until fully chilled).  Remove from fridge, and strain as much liquid as you can without *squeezing* it out of the salsa.  Add the remaining 1/4 of the lime juice as liquid.  Salt and pepper to taste and toss thoroughly.  The consistency is like pico de gallo that has been softened up ever so slightly by the cooking process.  It should look like this and will make an amazing topping for what's to come:


When I was in Phoenix this summer, I was in a wonderland of authentic Mexican cuisine - and it wasn't all carne this, carne that, either.  My hands down favorite dive in East Phoenix was La Condessa, and I may have single handedly kept them in business with the number of veggie street tacos I ate there.  So if you're wondering, yes, the next dish in the lineup is the famous La Condessa Veggie Taco, deconstructed and adapted by yours truly.

LA CONDESSA VEGGIE TACO
Package of small, organic corn tortillas, yellow or white
Bunch of fresh spinach
1-2 Poblano peppers, cut into strips, and seeded
1-2 jalapenos, seeded and minced
1/2 red onion, cut in strips
Fresh seasonal mushrooms, cut accordingly
2 TBSP Maggi Seasoning
Salt and pepper
Juice of 3 limes
1 large avocado
Olive oil

In a large pan or wok (cast iron best), heat olive oil.  Saute onions, mushrooms, poblano, and jalapeno over medium-high heat in a sauce of Maggi, lime, and oil.  When onions begin to look clear and mushrooms are browning, add spinach and rejuvenate the sauce as necessary.  After a couple minutes of cooking the spinach should be wilted and cooked.  Sprinkle with salt and cracked pepper, add a squirt of fresh lime juice, and serve over oven-warmed corn tortillas, street taco style.  Garnish with sliced avocado and top with mango salsa.


Finally, for the capstone to the meal - a comfort food dish that was bound to be a crowd pleaser on what was a particularly cold fall day - the Tortilla Soup, vegan style.  In the act of conceiving this culinary shock and awe campaign, I envisioned the Tortilla Soup as a light and delicate counterpart to the rest of the meal, where all the elements harmoniously hung in the balance... In actuality, when this dish rolled around I think we were both so full it was hard to even finish, not to mention that it was hearty enough to have been the sole course and no one would have complained.  But it was delicious.

VEGAN TORTILLA SOUP
1 can of "Cuban Style" Black beans
1 large can of crushed tomatoes
1 quart of vegetable broth
1 small can of fire roasted green chiles
1 or 2 ears of white sweet corn
Chopped chives or green onions
Fresh seasonal mushrooms, chopped
1 jalapeno, seeded and minced
1 poblano, seeded and diced
1 heirloom tomato, diced
1 large avocado, cut in strips
Juice of 2 Limes
3 TBSP ground cumin
2 minced garlic cloves
4 or 5 corn tortillas, from tacos, cut into strips
1/2 package of Daiya cheese
Tofutti Sour Cream (optional)
Salt and Pepper

In a large soup pot, saute the onions and garlic in olive oil.  Add corn (stripped from cob with a knife), mushrooms, poblano, jalapeno and saute for another several minutes, stirring.  Preheat your oven to 400.

Add the wet ingredients - canned chiles, canned tomatoes & veggie broth.  Add the cumin and salt and pepper to taste.  Stir and simmer the mixture on low-medium heat for half an hour.  After oven has heated, add strips of tortilla, tossed in olive oil, to a baking sheet and bake until golden brown.  If you want you could dust these in chili powder pre-baking, or lime juice.  

Right before serving, mix in chopped heirloom tomatoes and canned beans, add a dollop of sour cream to each bowl (if desired), top with a sprinkling of Daiya and chopped onions, and sliced avocado for garnish.


*Sigh of Relief.*  If you read this whole post, you know as well as I do what an undertaking it was.  Unless you are unemployed with some serious time on your hands, or addicted to trucker pills, this is probably hard to pull off on a regular basis for dinner.  But, I knew, as I crammed spoonfuls of tortilla soup into my distended stomach, that although it may happen more rarely than a spotted owl mating with a snow leopard, I can still bring some game in the kitchen.

Sunday, November 25, 2012

Vegan Thanksgiving 2012!

Photo: Happy Thanksgiving everyone!   

Year 4 of Vegan Thanksgiving!

I can't believe it. I've successfully pulled off a vegan thanksgiving 4 years in a row

And this year? Better than the last. Healthier. And a whole lot less stressful.

A better vegan cook I am becoming (I also channel Yoda on thanksgiving)

This year, the menu included:
  • Squash soup (made by a friend of the family)
  • Roasted veggies w/fresh rosemary and thyme
  • Green salad with citrus and sesame seeds (made by a friend of the family)
  • Stuffing made with whole grain bread, chestnuts, mushrooms and golden raisins 
  • Green bean casserole 
  • Wild rice stuffed squash and pepper (made by a friend of the family)
  • Mojito fruit salad
  • "Lightened-up" mashed potatoes (recipe below)
  • 2 kinds of vegan gravy
  • Homemade spiced cranberry sauce (recipe below)
  • Pull-apart Rolls
  • Not-Turkey from Trader Joe's!
  • Homemade apple-raspberry pie (made by a friend of the family)

Squash Soup


Citrus/Sesame Salad

Green Bean Casserole

Not-Turkey + Roasted Veggies


Stuffing


Roasted Veggies
The whole gamut!

From 12:00, clockwise: stuffing, mojito fruit salad, not-turkey + gravy, citrus salad, stuffed squash, mashed potatoes + gravy, pull-apart roll and then the roasted veggies in the middle! Everything is covered in cranberry sauce so sorry for that.

The mashed potatoes and the cranberries were my favorite parts. In fact, I have a delicious left-over bowl in front of me as I type this post.  Really though, everything was delicious. I'm just only going to include the recipes for the mashed potatoes and the cranberries because those take the cake (wait..it's thanksgiving...pie?)

Spiced Cranberry Sauce

  • One bag/box of fresh cranberries (I don't know the exact weight but they come pretty standard)
  • 1 1/2 cups Concord Grape Juice
  • 1/2 cup water
  • 1/4 cup agave 
  • 1/2 cup brown sugar
  • 1 tbsp lemon juice
  • 1 tbsp jamaican all spice (or regular if you don't have jamaican but try to get it!)
  • 1 tsp cinnamon
  • 1/4 scant tsp salt
Combine all ingredients in a sauce pan, bring to a boil and then simmer for a MINIMUM of 30 minutes. I did mine for about an hour and it was totally worth it, the more time it simmers the more time the flavors have to combine and settle in. Add more grape juice if you need it.

Remove from stove, place into a bowl and let set and firm up overnight.

Mashed Cauliflower Potatoes
  • 8-9 small/medium gold potatoes, chopped into 1/2-1 inch chunks
  • 1 smallish head of cauliflower, separated into florets
  • 1 Tbsp Earth Balance
  • 1 Tbsp non-dairy (Tofutti) Cream Cheese
  • 3 Tbsp Hummus or Tahini Paste
  • 1 large handful of chives, chopped
  • Salt + Pepper, to taste 
In a large pan, bring about 2 inches of water to a boil. Add the potatoes and boil/steam for about 15 minutes. Add the cauliflower and a touch more water if you need it and boil/steam for another 10 minutes or so.
Bad lighting - forgot to take a photo until they were 1/2 gone!


The idea here with the shallow water is that you don't want  the potatoes and cauliflower to get waterlogged - you want them to steam and cook up nicely so the natural flavors are locked in.

Once the potatoes and cauliflower are steamed, remove them from the pan. Using a potato ricer, "rice" the potatoes and the cauliflower into a large bowl. (Yes, the cauliflower will go through the ricer - no problem).

Mix in the earth balance, cream cheese and hummus using a fork until fully combined and fluffy. Then add the chives and salt and pepper and stir until fully combined. If your potatoes seem dry (they shouldn't be, but based on what kind of hummus you use they may be slightly less fluffy than you want) add in a little bit of soy creamer or plain non-dairy milk until you get the desired consistency.

Serve warm :)

So satisfying. I absolutely love the holidays - especially Thanksgiving. It is always a point of reflection and a big 'check-in' to see where I've been in the past year and where I'm going. Moreso than New Years or any other time of the year really. Thanksgiving always feels like the right time to reflect on life and take it all in.

But we should all remember to be grateful on a daily basis. If anything, that is the best lesson that Thanksgiving can teach. Being grateful feels good. So do it more.

And eat more (if it's delicious, cruelty-free, healthy vegan food).

Thanks, Thanksgiving.

Until next year, live long and prosper.


Monday, November 5, 2012

Pumpkin Cauliflower Dip + How to Roast the Perfect Pumpkin Seeds


If you know me at all you know that Halloween is my favorite holiday.


I absolutely love dressing up, handing out candy, and, most of all, I LOVE pumpkin things.

This year, I dressed up as Khaleesi from Game of Thrones :)

I even won a costume contest! Woo hoo!! Thanks Burnside Brewing :)

Colin dressed up as Luigi (another of our friends went as Mario!)


BUT - let's get to the reason you are here: the food :)

I would have absolutely loved to make a whole plethora of pumpkin-based things but as I was functioning with limited time, I only made a couple things this year :(

Fortunately! Those couple things were really really good.

First up! Pumpkin-Cauliflower Dip!

The inspiration for this recipe came from Kathy at Happy, Healthy Life but of course I modified it slightly :)


So this dip is a roasted cauliflower dip on the bottom, swirled with a pumpkin dip (I used chickpeas in both so it had a similar consistency to hummus. Baked hummus) and then baked briefly so it has a nice crispy layer atop.

Cauliflower Dip
  • 1 medium head cauliflower
  • 1 medium purple onion (or sweet onion if you have that on hand)
  • 3-4 cloves garlic (I loooove garlic but if you're less inclined, scale it back)
  • 1 tbsp oil
  • Salt + Pepper, to taste
  • 1/3 can of chickpeas
  • 3-6 Tbsp plain non-dairy milk
Preheat the oven to 425.

Chop up the cauliflower, dice the onion and arrange on a large baking sheet. Add the garlic cloves whole (you'll be food processing the whole thing later anyway so don't worry about getting everything perfect looking).

Drizzle with olive oil and salt + pepper and allow to roast in the oven for 20-25 minutes or until onion is yummy and caramelized tasting.

Allow to cool for 5-10 minutes and then transfer to a food processor. Add chickpeas and non-dairy milk of choice and process until the mixture resembles hummus.

While the veggies are roasting, I recommend you make your pumpkin dip, although you could easily prep it before hand as well :)

Pumpkin Dip
  • 1 can pumpkin puree (NOT pumpkin pie mix)
  • 2/3 can chickpeas
  • 1-2 Tbsp brown sugar
  • 2 Tbsp vanilla non-dairy milk
  • 1 tsp vanilla extract
  • 1 tsp each of: nutmeg, cinnamon, cloves (or, alternately, 3 tbsp pumpkin pie seasoning) 
  • Salt, to taste
Place all ingredients in your food processor and blend until smooth!

To prepare the dip: Spoon cauliflower mixture onto bottom of an oven-safe tray. Then place half or so of the pumpkin mixture on top of it.

Use a toothpick to make a "swirl" design.

Place the mixture in the oven and bake for 5-10 minutes or until there is a nice cripsy layer on top :)

Serve with veggies and crackers!

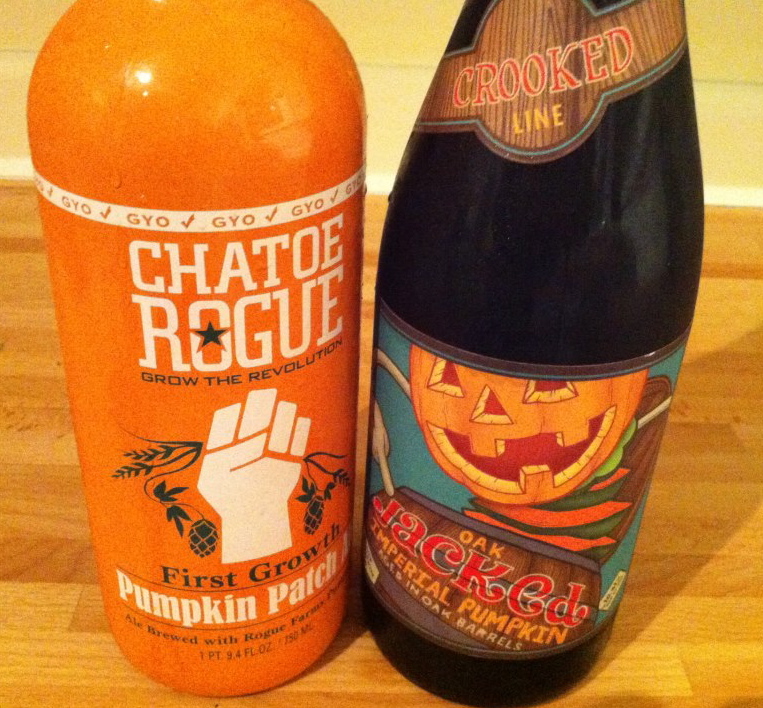
We also served ours with some excellent pumpkin beer.

This stuff is world-class, I'm tellin ya.

Rogue's First Growth, Pumpkin Patch

Crooked Line's Oak Jacked Imperial Pumpkin Ale

Not pictured but also DELICIOUS: Southern Tier's Pumking Imperial Pumpkin

I love love love pumpkin beer!!


Also in pumpkin mode: Mr. Wyatt.

He also loves Halloween. And pumpkins!


And Pumpkin SEEDS!

His momma loves pumpkin seeds, too, and she is now on Halloween cycle 3: mission to perfect the roasted pumpkin seed.

And by George I think I finally got it.

It's a process, but I have discovered the method to roasting the perfect pumpkin seed.

Are you ready?

OK!

To roast the perfect pumpkin seed you must take the following steps:

1. Extract seeds from pumpkin.
2. Remove as much pumpkin "goo" as possible from said seeds.
3. Place the seeds in a bowl with warm salt water (use LOTS of salt for this - it will help you later down the line)
4. Soak the seeds overnight
5. Boil the seeds in the salt water bath for 10-15 minutes
6. Transfer the boiled seeds onto a lightly greased cookie sheet (I do mine with coconut oil)
7. Bake pumpkin seeds at 425 degrees for 15-25 minutes (depending on how many you do!) turning occasionally with a spoon or spatula
8. Turn the oven to "broil" and broil the pumpkin seeds (with the oven door open so you can watch them) for an additional 5-10 minutes or until just beginning to brown and crisp up.


Voila! You have the uber-intensive but totally-worth-it fool-proof method to roasting the perfect pumpkin seed!

I hope your Halloween was as delicious and pumpkin-filled as mine!


Live long and prosper Hallovegans!

Thursday, October 4, 2012

Bibimbap Bowls

Bibimbap literally translates to "mixed rice" in Korean (not that you can tell from this picture) and is a relatively flexible dish but does have a few traditional consistencies.

Bibimbap is typically made with white rice (although I used Trader Joe's frozen 'fried' rice) and then topped with various fresh and marinated veggies, a fried egg, and spicy chili paste (sub Sriracha!). The ingredients are then all stirred together and enjoyed in either a regular or heated stone bowl.

Really, Bibimap is such a great dish because of it's versatility.  The idea behind it in Korean culture was that you could re-purpose whatever veggies were around the home and/or leftover from other meals in a simple, satisfying way.

For my version of Bibimbap, I tried to utilize some market-bought, in-season veggies (butternut squash, bell peppers, cabbage) as well as some more 'traditional' Asian veggies (carrots, bok choy, local kimchi and marinated mushrooms) with a little twist of veggie 'fried' rice from Trader Joe's and black beans for some extra protein. I also topped mine with an egg from my chickie-girls, but you could just as easily use silken tofu with a little sprinkle of tumeric in the center (for the yellow effect) or leave the egg out all-together.

Also - the Kimichi is not pictured and you can't see the rice (too loaded with veggies ;) but I promise they were both important to the whole composition of the dish and delicious!

Bibimap Bowl
Serves 2
  • 2 cups Trader Joe's Vegetable Fried Rice - sauteed or steamed
  • 1/2 can of black beans, warmed
  • About a quarter of a butternut squash, roasted 
  • 10 garlic-marinated mushrooms (they come in a jar, almost like they are pickled) cut into halves/thirds
  • 2 small heads of bok choy, sauteed in sesame seeds and sesame oil
  • 1/4 cup of carrots, marinated for a few hours in 1/2 cup of seasoned rice vinegar, 2 tbsps soy sauce and 1 tsp sugar
  • 1/2 cup chopped cabbage
  • 1/2 bell pepper, cut into strips
  • 1/4 cup Kimchi
  • 2 eggs, fried (or tofu - see substitution suggestion above) 
  • Sriracha or red chili paste, to taste
To Assemble 
Prepare all your veggies and have them laid out in an organized fashion.

Place the rice in a large bowl.  Place the fried egg or tofu atop the rice in the center. Arrange your veggies and beans around the egg in a colorful and pretty looking fashion.

Top with Kimchi and Sriracha.

Stir and mash it all together into a delicious and nutritious Korean meal.

Feel free to top with more Sriracha.


What a great meal. So simple and versatile and fun. I think it would be a great meal to make for a group of people - pair it with some Gimbap (kinda like sushi) and some rice wine and you have an impressive and unique spread.


Live long and prosper! And don't be afraid to branch out culturally in your cookings!

Tuesday, September 18, 2012

Chick'n and Dumplings

After 3 and a half grueling months in the extreme Arizonian heat, Colin is finally back in Portland. As part of his welcome home, I decided to attempt a dish that he has been bugging me to make for a while: "Chick'n" and Dumplings.

A variety of other bloggers and recipe developers have attempted Chick'n and dumplings, but I wanted to take a shot at a recipe all my own. It's pretty darn simple and much healthier than it's meat-based alternative (obvs.) 

You can use frozen or fresh veggies - I used a combination of both, but I definitely recommend the "Organic Foursome" frozen veggie medley from Trader Joe's (corn, peas, carrots, green beans) + fresh celery, carrots or whatever else you have hangin' around.


Chick'n and Dumplings
For the Roux
  • 1 Tbsp coconut oil
  • 1/2 medium yellow onion, diced
  • 1 cup chopped celery
  • 3/4 package of frozen "Organic Foursome" veggies
  • 1/2 package Trader Joe's "chick'n"
  • 3 cups veggie broth
  • Added bouillon cube/paste (for more flavor, this is totally optional)
  • Italian seasoning, salt + pepper, seasoning to taste
  • 1/2 cup flour
  • 1/2 cup white wine 
  • 1 tsp Earth balance
For the Dumplings
  • 3/4 cup flour
  • 2 Tbsp Earth Balance 
  • 1/2 tsp baking powder
  • 1/2 tsp salt
  • 1/3 cup plain soymilk
  • 1 giant handful of cilantro, chopped
Begin by sauteing the onion and celery in the coconut oil over medium heat for 3-4 minutes. Add frozen veggies and "chick'n" and continue to saute until warmed through. Then add the veggie broth and bring to a boil before lowering to a simmer for about 10 minutes.

While the broth is simmering, prepare your dumplings!

Whisk together flour, baking powder, and salt in a medium bowl. Cut in earth balance with knives or pastry cutter until a crumbly dough forms. Add soy milk and stir until a thicker dough forms. Then stir in chopped celery.

In a LARGE sauce pan with a lid (that will hold the contents of the entire dish) begin to warm the earth balance over medium heat. Slowly whisk in flour and white wine until a thick roux forms (about 2 minutes). Slowly spoon in the contents of the veggies + broth you prepared earlier, continuing to stir so that no large lumps form.

When broth is completely spooned into the sauce pan over medium heat, either cut dumplings into squares or just pick off pieces of the dough with your hands (that's what I did) and drop little dumplings over the top of the simmering, delicious roux-broth.

Cover the pan and allow everything to simmer for another 10 or so minutes until dumplings are fully cooked (don't remove the top because it will let the steam escape! That is what is cooking the dumplings!)


Prepare to be in comfort food heaven!

This is seriously one of the most satisfying dishes EVER. Colin said it was in his top 5 :)

He also wanted it for breakfast the next day but, alas, we ate the entire thing. In one sitting.


Live long and prosper! And enjoy vegan comfort food!

Monday, August 20, 2012

Pizza 2 Ways

I used to think that as a vegan I would never again get to eat pizza as I knew and loved it.

There weren't very many things I really felt as though I would be truly missing out on, but pizza was one of them.

Turns out, becoming vegan actually opened my world to the vast array of plant based pizza crusts, sauces and toppings that come together to create a plethora of delicious vegan pizza varieties.

In fact, when I decided to share the versatility of vegan pizza with a few of my girlfriends at a girls night I was hosting (to go along-side the wine, of course), it almost couldn't narrow it down to just two types! Finally, I decided on two unique and delicious pairings that deviate from the standard "cheese-pizza" model to show how satisfying, nutritious and diverse vegan pizza can be.

The first kind of pizza I decided on was a pesto/cashew cheese base with roasted corn and garden-fresh tomatoes on top.

I alternated large globs of the pesto and cashew cream sauce and then squished tomatoes over the top before sprinkling the corn over the whole bit.

Tasted bomb.

Pesto

My favorite way to do pesto is to add about a quarter cup of peas to give it a creamy, spreadable texture without having to over-kill the oil.
  • 4 large handfuls fresh basil (I basically fill my food processor up with it)
  • 1 large handful fresh spinach
  • 1/4 cup frozen petite peas, thawed
  • 1/4 cup nutritional yeast
  • 1/4 cup raw walnuts
  • 2 cloves garlic
  • 2-3 Tbsp Extra Virgin Olive Oil
  • 2 tsp salt
Blend all ingredients in a food processor until smooth. Add more peas or more oil until you reach a desired consistency. Season to taste.

Cashew "Cheese" Base
  • 1/2 cup raw cashews, soaked overnight
  • 1/3 cup Creamy Corn and Roasted Pepper Soup from Trader Joes
  • 2 tsp Celery Seed and 2 tsp Onion Powder
  • 2 Tbsp Nutritional Yeast
  • 4 cloves Garlic
  • 1 Tbsp Lemon Juice
Blend all ingredients in a food process until smooth.

To assemble the Pizza

I buy the fire roasted corn frozen from Trader Joes when I don't have time to roast my own and then bake it in the oven for about 10 minutes at 350.

Roll out pizza dough (again - Trader Joes - I'm taking the easy road here!) into desired shape and size. Alternate large globs of pesto and cashew cheese. Then place tomatoes evenly on top of the sauces, using the tomatoes to squish the sauce down. Finally, sprinkle the baked, fire roasted corn over the pizza and pop it in the oven for 20-25 at about 400 degrees (this will very based on the type of pan or pizza stone that you use. I used a pre-heated pizza stone and made two smaller pizzas so again, just watch it. When it looks brown around the edges, pull it out!)


The second type of pizza I ventured to make (again with help from pre-made items from Trader Joes :) was a roasted garden veggie pizza with a bruschetta sauce and topped with fresh arugula and basil.

I really wanted to utilize as many ingredients from my garden as possible to show off all of the hard work my mom and I have put into it this season (mostly my mom - she's a garden goddess).

So for this pizza I roasted up an assortment of veggies - most fresh from the ground- including:
  • Beets
  • Zucchini (green and yellow)
  • Carrots
  • Tomatoes
  • Sweet potato 
  • Garlic
To roast them, all I did was cut the veggies into relatively uniform sizes, toss them with some coconut oil, herb blend and some salt and toss them in the oven for about 20 minutes at 425 degrees.

Then, I rolled out my pizza dough and spread it evenly with Trader Joe's Bruschetta (the stuff that comes in the JAR - not the fresh, it will be too runny) and topped it with the roasted veggies.

Then, after baking the pizza for an additional 20-25 minutes at 400 degrees, I pulled it out and covered it with fresh basil and arugula from the garden before serving.


Isn't it pretty?

The best thing about these two pizzas is how incredibly different they are. Other than the dough, these pizzas had little it common AND neither of them used the traditional red-sauce and cheese model.

Both were so satisfying and fresh and healthy - I wonder why I ever in a million years thought I would be missing out on pizza! Vegan pizza is the BEST!

Speaking of which, I was stoked to find out that Pizzicato (Portland-based pizza chain) agrees with me!
They recently released 3 new vegan pizza varieties including a middle eastern and a thai-style. Between that and the acclaimed pies from Dove Vivi, Sizzle Pie and Portobello, I feel like I'm not the only Portlander who is a vegan-pizza convert!

So get out there and get (or MAKE) some!


Live long and prosper! And enjoy all of the vegan-pizza-goodness in the world!


Thursday, August 16, 2012

Restaurant Review - Araya's Place

Recently, I had the pleasure of visiting my aunt at her lovely apartment in the heart of Bellevue, Washington. I was absolutely thrilled to visit Bellevue and even more excited to try an adorable little vegan Thai restaurant called Araya's Place.

In Portland, decent Thai restaurants are a dime a dozen and almost all of them have vegan options, so I was a little skeptical that this strictly vegan eatery could be that impressive - but I'd heard race reviews so naturally I had to give it a try.

I was blown away.

Boasting a HUGE vegan menu, I was overwhelmed by the amount of delicious sounding options, fresh ingredients and perfectly paired little wine list. Not to mention the decor of the place is totally comfortable, warm and inviting.

After many bouts of picking up the menu, deciding on one thing, putting the menu down, only to pick it back up again and change my mind, my aunt and I decided on a few winning dishes:

To start: Veggie Satay.


I like to select simple appetizers in vegan restaurants because I figure, if you are really going to succeed as a vegan restaurant, you better be able to make a simple, vegetable based appetizer well. And Araya's gave me faith from the appetizer-get-go.

Paired with a light and perfectly seasoned little cucumber salad and a smooth, creamy peanut sauce, the vegetable satay was seasoned and grilled to absolute perfection. A perfect combo of garden veggies (broccoli, zucchini, carrots, onions, bell peppers, eggplant, mushrooms) laid over a bed of spinach, I was immediately impressed by the presentation, flavor and quality of our first dish.

And let me tell you, it only got better from there.


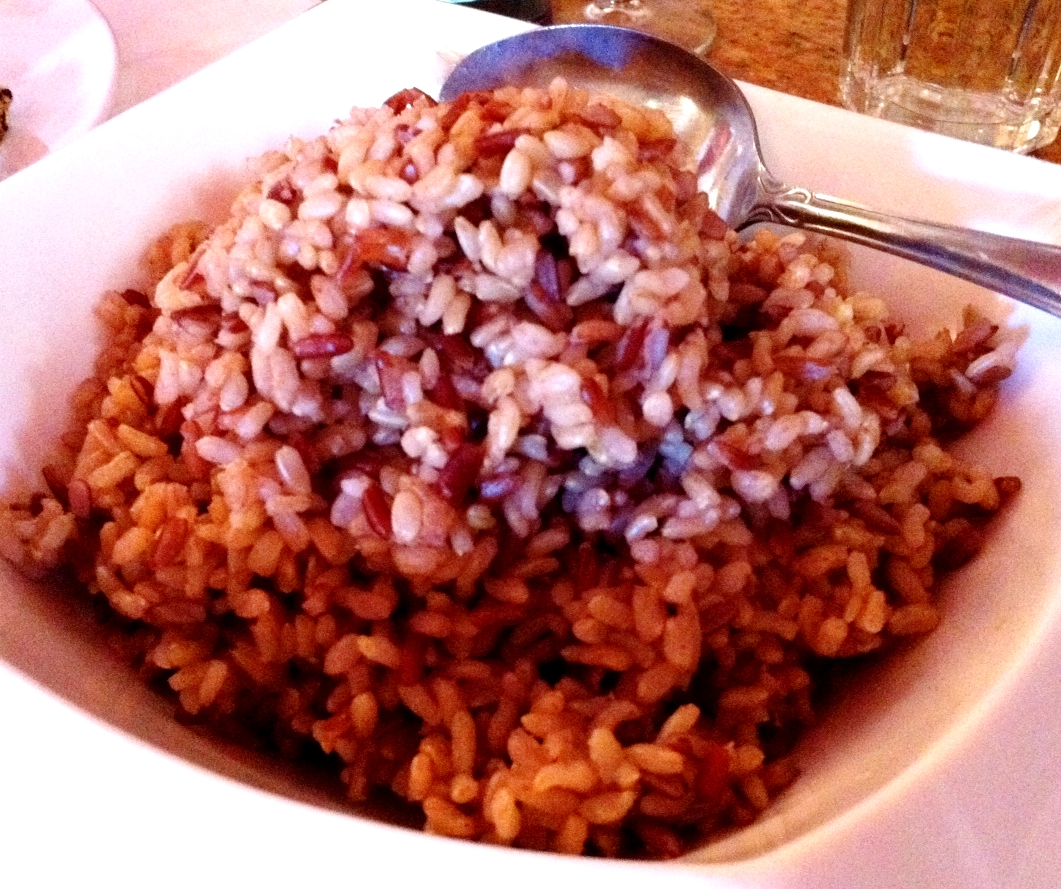
What first impressed me when they brought the entrees out was the rice. We selected brown rice and, normally in Asian food restaurants, I expect brown rice will simply be the slightly more fibrous (but still relatively flavorless and limp) sister to the white rice alternative and that I won't be particularly keen to fill my plate with it. Not at Araya's. When the rice arrived it was colorful, flavorful and perfectly fluffy.


The rice really just added to the whole experience of Araya's and was a perfect complement to the two lovely dishes we ordered to share.

First we decided the Avocado Curry after seeing a couple of our fellow diners try it (Avocado, seitan, soft & fried tofu, bell pepper and basil in green curry). The curry did NOT photograph nearly as well as I would have liked but it tasted and looked soooo good.

See? Doesn't look that pretty. But it was. Pretty and delicious.

This curry was one of the most unique and flavorful curries I have ever tried. I absolutely loved the texture of the avocado paired with the seitan - a sort of meaty, hearty flavor that can be difficult to find in vegan dishes. Plus I love that this dish packs in healthy oils and a punch of protein while still tasting healthy and fresh. 

Next we ordered "Araya's Asparagus" which consisted of seitan, ginger, asparagus, portobello + shiitake mushrooms. 


This was probably my favorite dish. Arayr's chefs really know how to cook vegetables (a lost art at many Thai restaurants) and the house made seitan was absolutely superb. Pair those two things with a wonderfully flavored sauce and beautiful presentation and it is easy to see why this dish is a house favorite.

Overall, the Araya's experience exceeded my expectations and is absolutely worth a visit if you are in the Seattle/Bellevue area (there are two locations!! One in Seattle and one in Bellevue!) I especially recommend bringing a meat-eating friend here because I am confident the flavors and textures will surpass any that they have come to expect from other Thai restaurants.

For the menu, info about the restaurant and directions to each of the locations, check out Araya's website:
http://arayasplace.com/


Oh--two more things I forgot to mention. Araya's has an in-house vegan bakery that whips up delicious sounding baked goods like Salted Caramel Bars, Banana Chai Cake and Matcha Chocolate Chip Cookies.

We were far too full to indulge in any of these delights but they sounded and looked absolutely amazing. Something to look forward to next time!

Also - Araya's has a lunch buffet SEVEN DAYS A WEEK for $8.99 which would likely be far too overwhelming for me to handle if I lived near it so at this point I'm glad I have my distance.

This place is a GO so text time you are in Washington, make the trip. You won't be disappointed in Araya's.


Live long and prosper. And don't be afraid to judge a restaurant by the quality of their vegetables.